Migrating a WordPress single install to a multisite – direct method
Migrating a WordPress single site install into a WordPress multisite isn’t exactly straightforward, but I’d like to present a method for those of you that are not scared of FTP, SQL queries or dropping some tables.
So, if you…
- Have FTP access to both of your sites
- Have some kind of database access for both of your sites
- Aren’t scared of dropping some tables or editing a SQL export
Then read on.
1 – Your single WordPress installation
1.1 – The files
You’ll need the files for your single site install and specifically you’ll need the
- media files
wp-content/uploads/[years], - theme
wp-content/theme/[your-theme]and - plugins
wp-content/plugins/.
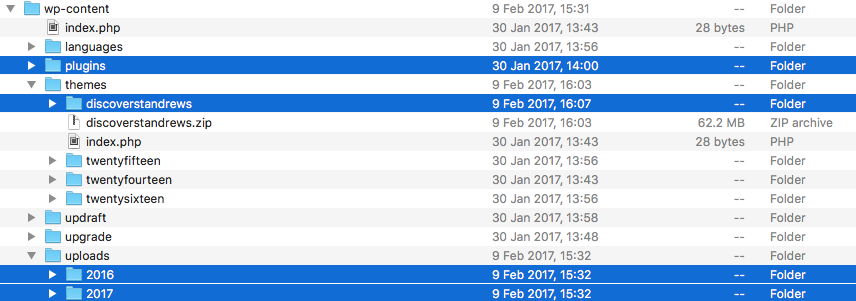
In this screenshot I’ve selected the folders that I needed, wp-content/themes/discoverstandrews, wp-content/uploads/2016, wp-content/uploads/2017 and the wp-content/plugins/ folder. Your themes, plugins and years may vary.
1.2 – The database
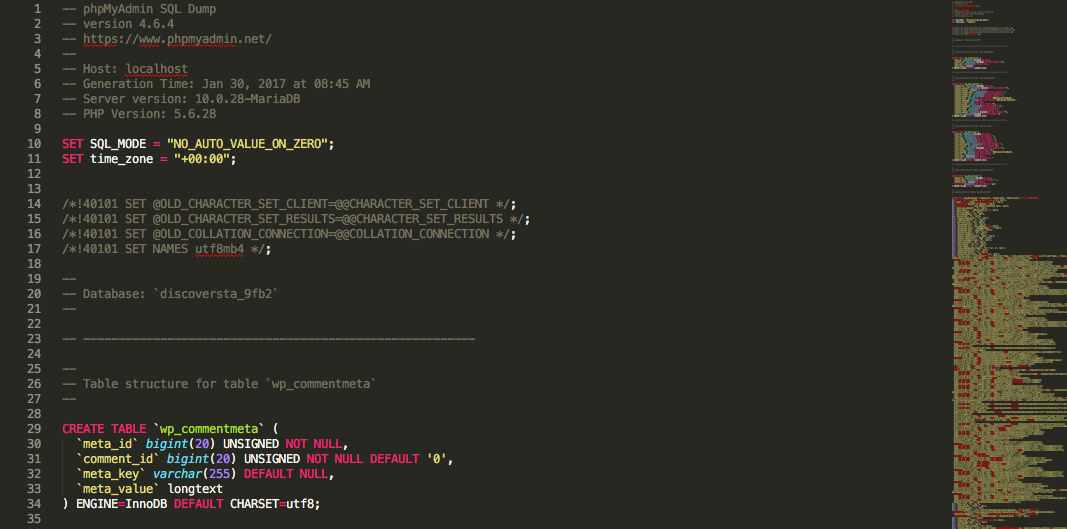
You’ll need to get an export of your database for the single install, I use the superb Sequel Pro on OSX for this, but you could use phpMyAdmin just as easily. The exported database should look something like this when opened in a text editor
2 – The WordPress multisite
You’ll need to do a little bit in the multisite before we edit the SQL file, so go create a new site (be sure to make a note of the new url for later). What we’re looking for is the id for that new site, you can usually find this from the [your-multisite]/wp-admin/network/sites.php page and hovering over the new site url. In Chrome it pops up in the bottom lefthand corner or you can copy the link address. Whatever way you find it just write down the site id, in my case it was 292.
2.1 Jump in the database
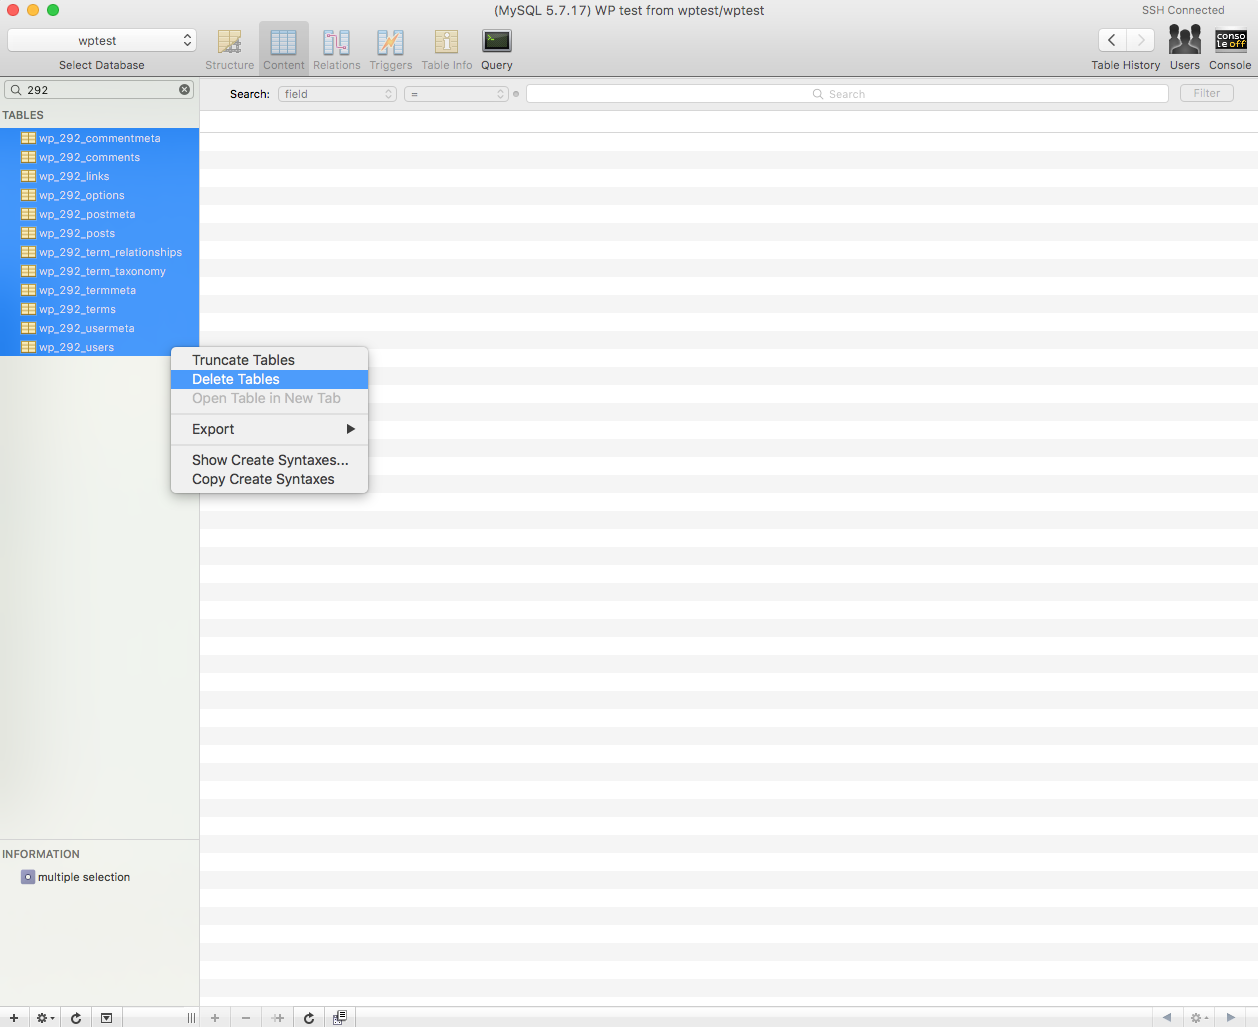
Now this part always makes me slightly nervous, trust me on this, but filter down your tables to your new site id. You’ll see stuff like wp_292_options and etc, as long as all you see are tables with your site id you’re good to go. Now delete those tables, as we’ll be adding them from the single install.
Here’s what mine looks like from Sequel Pro:
That’s all we need for now in the multisite database, but leave your connection open as we’ll need it again shortly.
2.2 – The files
Now go and upload your files from the single site, remember for me it was the theme, plugins and uploads. The theme(s) and plugins go in the same place as they were on the single install, so no difference there (I just uploaded them in place, you could install them if you have the zip for the theme or plugins).
For the media files, look in your wp-content folder, you’ll see a folder called blogs.dir, inside of that are a bunch of folders with site ids. Go find yours and upload your year folders inside the files folder. So for me that was wp-content/blogs.dir/292/files/.
2.3 – Editing the exported SQL file
Now the fun/tedious part, we need to translate the SQL file (remember the one you exported for the single site?) into something that’ll work with your multisite. Open up your text editor of choice, we use Sublime text here, and we’re going to be adding the new site id to all our CREATE TABLE statements. So we’re changing CREATE TABLE `wp_commentmeta` ( to CREATE TABLE `wp_292_commentmeta` (. But as a word of warning…
wp_ with wp_292. This will lead to bad things, in my case it broke the media library links.It’ll take a little bit of time but just find all the CREATE TABLE statements and run a find-replace for each thing, so wp_commentmeta to wp_292_commentmeta is great. Rinse and repeat until you have all of them with the id inserted into those tables names.
While you’re in there you might as well replace the single site URL to match what your new multisite URL is, this one is safe to do a straight up search-replace on.
2.4 – Import the SQL file
Once you have your SQL file setup you just need to import it into your multisite database. Sequel Pro makes this quite easy for me, but phpMyAdmin and other database tools will do this as well.
3 – Time to test your new site
Navigate to your new site and see that it looks and works as it should, both on the front-end and back-end. Make sure you can add posts or pages and edit them.
If you notice anything going wrong just drop those tables prefixed with your site id, edit the SQL file, and try again. You shouldn’t need to re-upload the files/media with any of the import, in my case I just had to do a few tweaks to the SQL file and reimport it before the site was up and running.
Now you can kick back and enjoy your single site that’s now safely inside of your WordPress multisite.