Fixing broken links using Siteimprove
We’ve all encountered the frustration of clicking on a link and instead of the expected content, ‘404 not found’ appears. Broken links are an unavoidable part of today’s internet as websites change their infrastructure and old pages get replaced. This is where Siteimprove comes in.

Siteimprove provides a number of online tools that help you to better manage and maintain your website through content quality assurance, web accessibility, analytics, SEO and response monitoring.
How it works
At St Andrews, we primarily use the quality assurance tool which automatically checks our website for broken links and spelling mistakes. Every page on our site (23,000+) gets scanned every five days, but you can set restrictions to only scan certain sections of the site instead of every page. The results of this scan are shown on the overview section of the Siteimprove web portal.
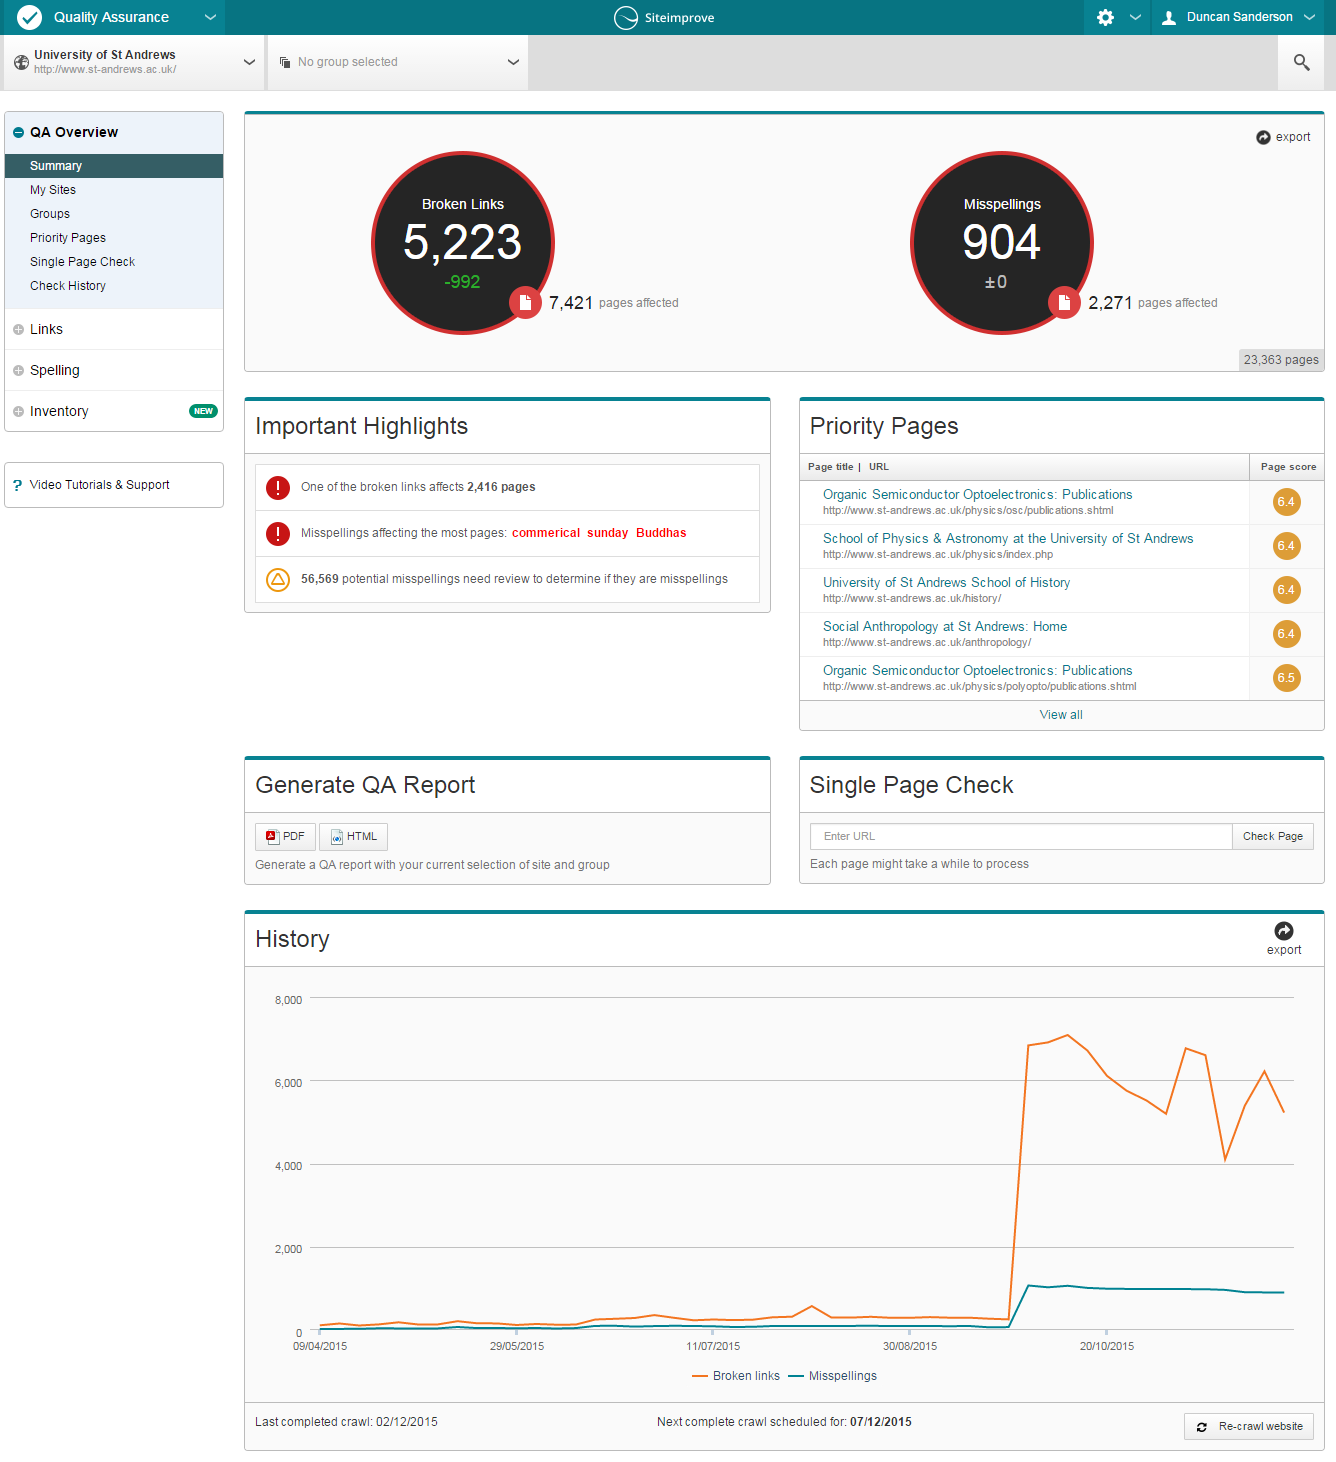
Here you can see information about the number of broken links and misspelt words, along with the number of pages on your site that are affected by each. This page also shows important highlights, priority pages, a report generator, a single page on-demand scanner and a graphical history, allowing you to easily track and report your progress.
Sadly that’s where the automation ends; now you need to manually go through each of these pages and fix the broken links and correct the spelling mistakes. Siteimprove does make this process relatively easy though!
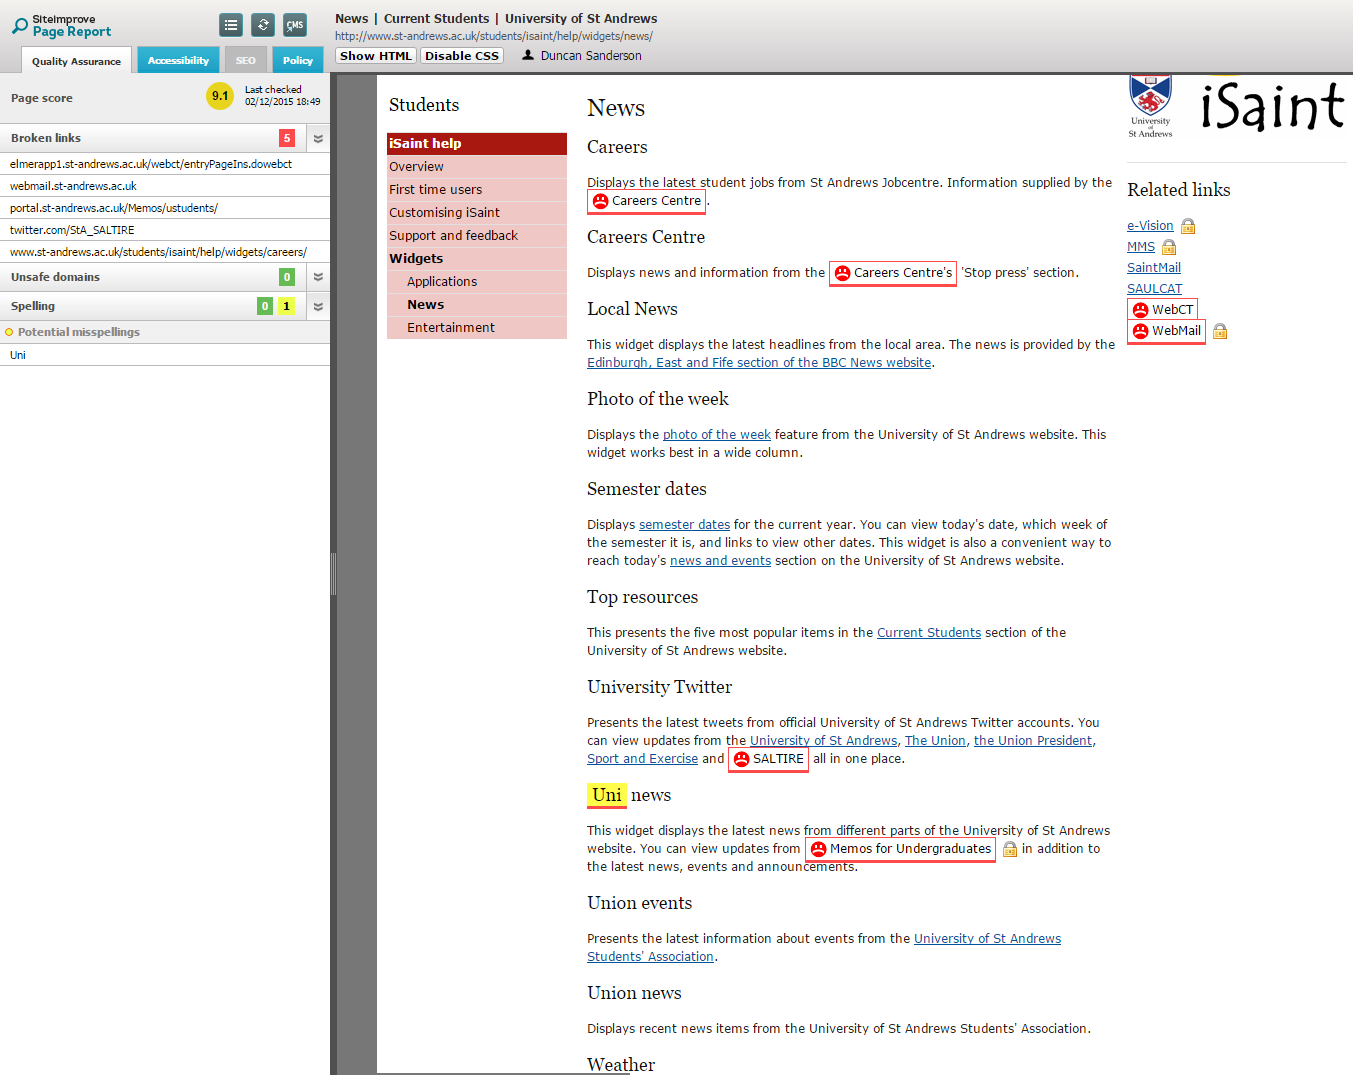
When you open an individual page report, you’ll see a listing on the left-hand side showing the broken links, misspelt words and any potentially misspelt words. The right-hand side shows a cached version of the page highlighting any broken links (sad face and a red border) and spelling mistakes (red or yellow boxes) directly on the page, meaning you don’t have to spend ages looking for them. You can further highlight an individual broken link or misspelt word by clicking on it within the left-hand listing, which will cause the highlighted border/box to flash for that particular link or word.
Once you’ve fixed all the links and spelling mistakes on a page you can simply close it and wait for the next site scan to check the page again. The page will then be removed from the list – if you’ve managed to successfully fix all the broken links and spelling mistakes that is!
Why this is important
As I mentioned above, nobody likes a broken link. Users can become frustrated and will eventually just go somewhere else to get the information they’re looking for. In our case, it’s crucial that our links work properly, particularly on the student-focused sections of our site. If a potential student can’t find the information they’re looking for because of a few broken links, they may be tempted to try a different university.
Siteimprove’s quality assurance tool certainly helps to solve this problem – we couldn’t possibly check every link on every page as often as Siteimprove does. This tool significantly reduces the amount of time it takes to find and fix these errors, helping to improve the quality and integrity of our site, and also allowing us to spend more time working on other projects.