Google tag manager introduction
I first heard about Google Tag Manager at IWMW when Martin Hawksey gave a workshop on Google Analytics. Since then I have been experimenting with Google Tag Manager to see how we can use it to track specific events on a web page. For example, tracking the number of clicks on a tab or link. The following describes how to set up Google Tag Manager to track when a user clicks on an accordion to reveal content within a web page (in our case we are using accordions to reveal a list of PGT courses within our taught programmes web page.) There will be follow-up blog posts on the data this has returned.

Overview
Google Tag Manager allows you to inject ‘tags’ into a web page. The tags are pieces of JavaScript code that be used to do a myriad of useful things within the client’s browser. The tags can be used to add Google Analytics code to your page, or, it can sit alongside an existing Google Analytics tracking code without any adverse effects.
The Google Tag Manager code needs to be added immediately after the <body> tag and looks like the following:
<!-- Google Tag Manager -->

<noscript><iframe src="//www.googletagmanager.com/ns.html?id=GTM-MPRxxxx"

height="0" width="0" style="display:none;visibility:hidden"></iframe></noscript>

<script>(function(w,d,s,l,i){w[l]=w[l]||[];w[l].push({'gtm.start':

new Date().getTime(),event:'gtm.js'});var f=d.getElementsByTagName(s)[0],

j=d.createElement(s),dl=l!='dataLayer'?'&l='+l:'';j.async=true;j.src=

'//www.googletagmanager.com/gtm.js?id='+i+dl;f.parentNode.insertBefore(j,f);

})(window,document,'script','dataLayer','GTM-MPRxxxx');</script>

<!-- End Google Tag Manager -->
Within Google Tag Manager there are three main components that need to be set up:
- tags
- triggers
- variables
Triggers
Triggers are the conditions upon which an event will be initiated e.g. clicking on a link, clicking on a <div>. Triggers need to be created first so they are then available when the tag is created.
In our example, we wanted to track clicks on accordions within the taught programmes page. The underlying code has:
<div class="accordion"><a id="d.en.343020"></a>

<h3><a class="toggleLink" href="#"><i class="chevron"></i>Chemistry</a></h3>

<div class="toggle">

<ul>

<li><a href="/chemistry/prospective/pg/">Chemistry</a> MPhil</li>

<li><a href="http://www.st-andrews.ac.uk/study/pg/taught-programmes/chemical-science/">Chemical Science</a> MSc</li>

<li><a href="http://www.st-andrews.ac.uk/study/pg/taught-programmes/computational-chemistry/">Computational Chemistry and Modelling</a> PG Certificate (Distance Learning)</li>

</ul>

</div>

</div>
To create an event that will activate when a user clicks on a link with a class of ‘toggleLink’ we used the ‘click’ event and set it to target all elements, but to only fire when the class that was clicked had ‘toggleLink’ and www.st-andrews.ac.uk/study/pg/taught-programmes contained in the URL of the page.

Tags
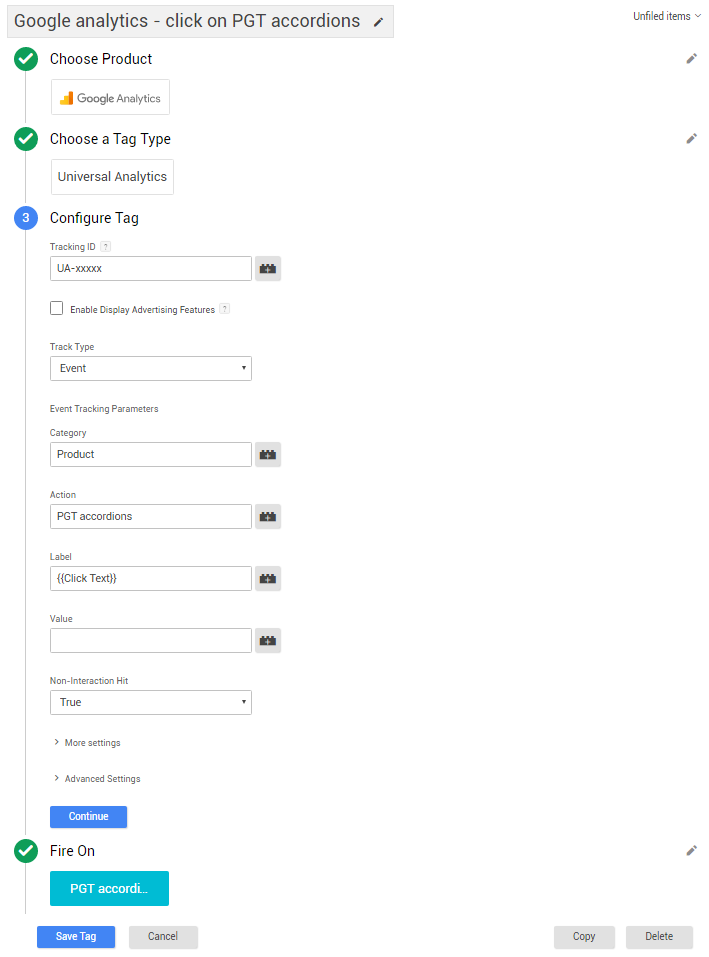
Tags are the pieces of code that get added to your web pages via the Google Tag Manager code. The code is activated when the conditions of a ‘trigger’ are met. To set up a tag to monitor clicks on a div with a class of ‘toggleLink’ we needed to do the following.
- use the Google Analytics product
- use the Universal Analytics tag type
- enter the tracking ID of Universal Analytics
- Track type: event
- Category (this is the name given to the category that is displayed in Google Analytics). In the example below we are using ‘product’.
- Action (this is the name given to the action field in Google Analytics). In the example below we are using ‘PGT accordions’.
- Label – when a user clicks on a div with a class of ‘toggleLink’ it will return the text displayed in the div.
- Non-interaction hit – set to true. By default events affect the bounce rate, that is, if a user lands on a page and an event is triggered, they are not a bounce. Therefore, setting this to true means that bounce rate is not affected by the event.
- the tag is set to fire on the ‘PGT accordions – toggleLink‘ trigger created previously.
Variables

Variables define the data that is passed between triggers and tags. As we wanted to track clicks on the class of a div on a specific page we needed to make sure that ‘Page URL’, ‘Click Classes’ and ‘Click URL’, ‘Click Text’ are enabled as a minimum.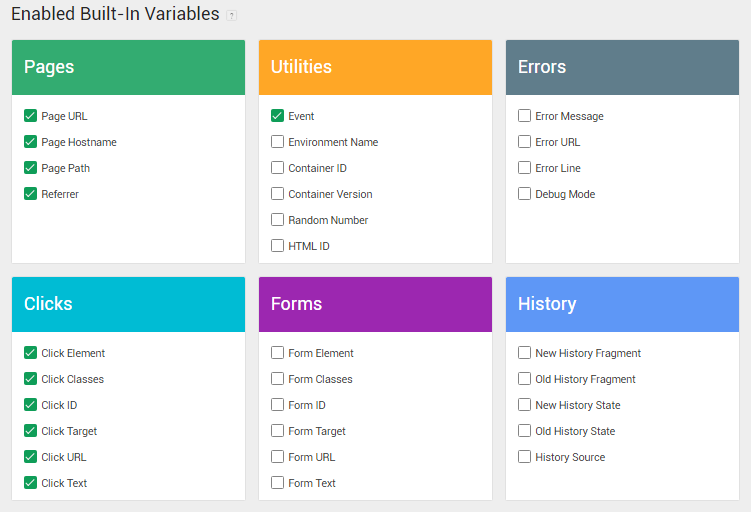
Testing Google Tags
Before the tag is published it is important to preview and debug it. This is done by clicking on ‘preview’ on the top-right hand side of Google Tag Manager.
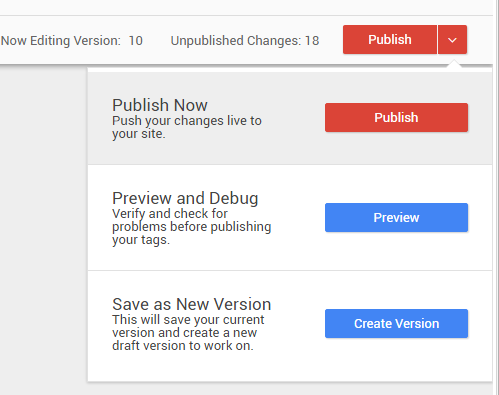
When the preview option is selected it puts the browser into a special Google Tag Manager debug mode. From there you can easily see if the tags are being activated when you click on an accordion.
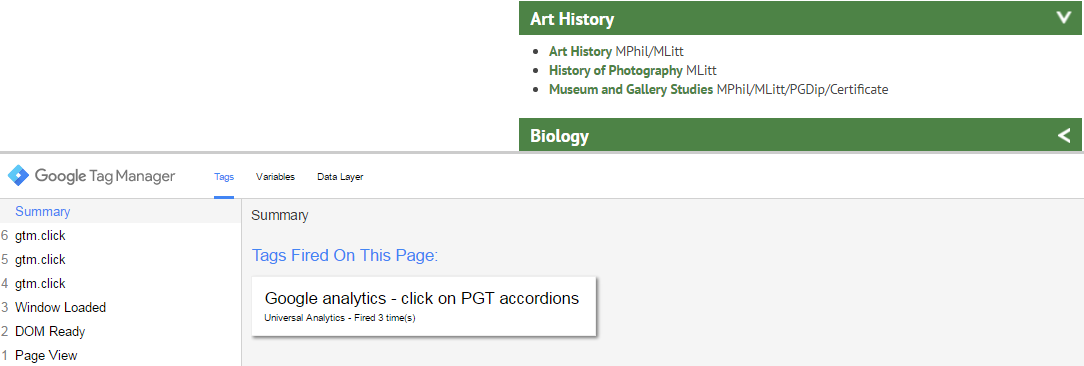
You can also check if data is being sent to Google Analytics via the real time event tracker. When an accordion is clicked it will record this instantly.

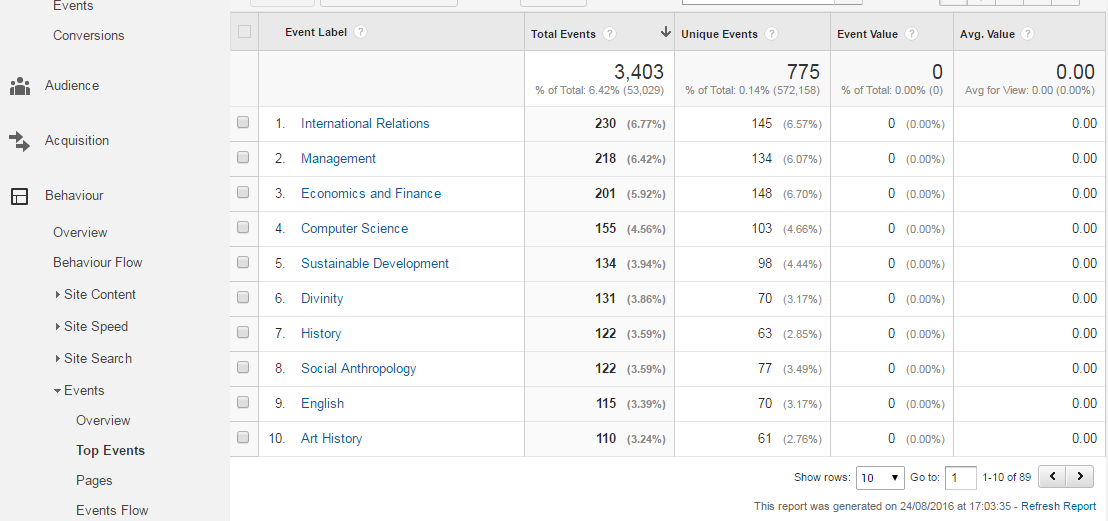
To view a report of events you use the events section of behaviour within Google Analytics. You may need to set ‘event label’ as the secondary dimension in order to see the results.
Conclusion
Initially it was difficult to work out how to use Google Tag Manager. After watching a few videos on YouTube we were able to get it working. We now have the ability to evaluate how users are interacting with web pages rather than merely looking at the number of page views. This will be a powerful tool as we aim to continually improve the user experience on the University of St Andrews website.